7 Urine Collection Equipment Buying Tips for Buyers
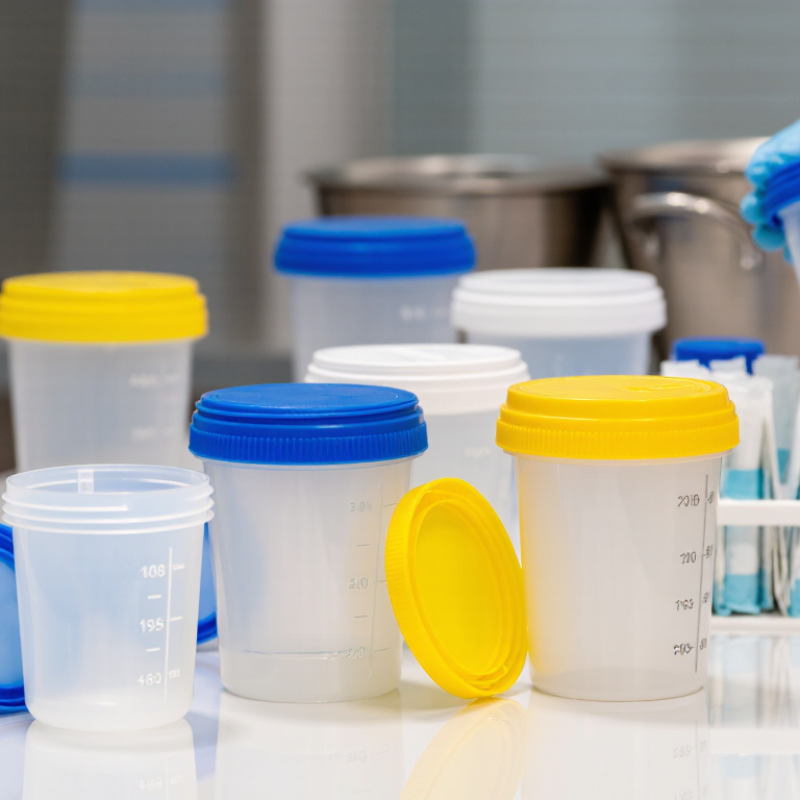
Choosing Urine Collection Equipment involves more than comparing prices or selecting a familiar brand. A container that looks suitable on a catalog page may be difficult to grip, label, or open when staff are working quickly. Small details matter. Buyers should examine capacity, graduations, lid fit, material, packaging, and compatibility with their collection and transport workflow. A clear scale and a secure, leak-resistant closure can make everyday handling more dependable.
To frame the checklist, fictional clinical-supplies adviser Alex Morgan offers this practical reminder: “A reliable collection system is judged at the point of use, not just on the purchase order.” Treat that as an editorial perspective, not a sourced quotation. Fit comes first. Consider who handles the equipment, where it is stored, and how supplies are replenished. Ask vendors for product specifications and samples, then check whether labels remain readable and lids close consistently. Also review instructions, quality documentation, and customer support before placing a large order. These checks do not guarantee a perfect purchase; real workflows can expose issues that a brochure misses. The seven buying tips ahead help buyers compare options carefully, spot trade-offs, and choose Urine Collection Equipment suited to their setting.
Define the Collection Need: Spot, Midstream, Timed, or Catheterized Urine
Urine collection equipment should match the specimen type, not just the test volume. A spot sample is collected once, often in a sterile cup for routine testing. Confirm the required container and handling instructions with the laboratory. Small details matter. A cup that is hard to open or label can lead to delays, even when the sample itself is suitable.
Midstream collection usually requires a clean-catch cup and clear patient instructions: begin urinating, collect the middle portion, then finish in the toilet. Timed collection needs a larger, secure container, readable start and end times, and storage guidance from the laboratory. Some timed tests require all urine over a specified period, so a missed collection may affect results. Catheterized samples require sterile equipment and trained clinical staff; buyers should confirm the intended procedure and follow clinical protocols. Do not substitute a drainage bag sample unless the care team or laboratory specifically directs it. It is easy to overbuy one universal kit and overlook these differences. Compare cap seals, graduations, labels, and transport packaging against the actual collection workflow. One awkward step can matter.
Choose Urine Collection Equipment for the Specimen Needed
Spot and midstream collections generally capture one void. A timed collection gathers urine throughout a prescribed interval, commonly 24 hours, so it is not a single-void collection. A one-time catheterized specimen is collected during a single procedure. Choose the container and supplies for the requested method, and follow the clinician’s or laboratory’s instructions.
Match Cup Sterility and Volume to the Test, Especially for Urine Culture
For urine culture, cup sterility is not a minor purchasing detail. Choose individually sealed, sterile containers, and check that packaging stays intact during storage and transport. A cracked seal or a hand touching the inside can compromise the sample. Keep the lid and rim clean.
Match capacity to the laboratory’s requested volume, not just the cup’s advertised size. Culture may need less urine than some other tests, while combined testing can require more. Confirm minimum-volume rules with the receiving laboratory before ordering. Graduated markings help staff judge the fill level, but they may not provide precise measurement. Small details matter.
A wide opening can make collection easier, especially for patients with limited mobility. A secure, leak-resistant lid helps prevent spills on forms, gloves, or transport bags. Check that labels adhere to the cup’s surface and leave room for patient identification and collection time. It is easy to focus on unit price and overlook these practical checks. I would also verify that the chosen container fits the lab’s handling process; a cup that works at collection may still be awkward to label or transfer.
Choose 24-Hour Collection Jugs for the Full Collection Period and Preservative
A 24-hour urine jug must cover the entire collection period, not just the expected volume. The American Urological Association’s Medical Management of Kidney Stones guideline recommends one or two 24-hour urine collections for metabolic testing. Buyers should therefore check jug capacity against likely output, leaving room to close and handle it safely. A container that is nearly full by evening is a practical failure, even if its label says “24-hour.”
Preservative choice matters as much as capacity. Different tests may require different handling, so confirm the laboratory’s instructions before selecting a jug; do not assume one preservative suits every assay. The Clinical and Laboratory Standards Institute’s GP16 guideline supports standardized urine collection and handling. Check that the container material is compatible with the specified preservative, the cap seals firmly, and the label has clear fields for patient details and collection start and end times. Small details matter.
A useful workflow is to discard the first morning void, record the start time, then collect every void through the same time the next day, including the final sample. Keep the jug as directed by the laboratory, often refrigerated or kept cool. This sounds fussy, and it is. Still, an easy-to-read scale and a stable handle can help prevent spills and missed portions. Ask the supplier for written compatibility and capacity specifications, not just a product photograph.
Follow CLSI Handling Guidance: Test Within 2 Hours or Refrigerate at 2–8°C
When choosing urine collection equipment, check that containers are sterile, leak-resistant, and easy to cap securely. Clear volume markings and a writable label area help staff record collection time without covering important details. Time matters. A container that fits neatly into a transport rack can also reduce spills during busy handoffs.
Follow your laboratory’s current CLSI-based handling procedure. For routine urinalysis, aim to test the specimen within two hours of collection. If testing will take longer, refrigerate it at 2–8°C, and document the collection and storage times. Keep it labeled. A monitored refrigerator or validated transport cooler helps maintain the required temperature; an ordinary desk or warm vehicle does not.
Choose equipment that supports this workflow, such as sealed bags for individual specimens and racks that keep containers upright. Some tests have specific collection or preservation requirements, so confirm the laboratory’s instructions before purchasing in bulk. Refrigeration can affect the appearance of a specimen, including causing crystals to form; staff should follow local procedures for mixing and preparation before testing. In real workflows, handoffs still slip sometimes. A good container cannot replace a clear timestamp or timely transport.